
[!] この記事は公開されてから1年以上経過しています。情報が古い可能性がありますので、ご注意ください。
はじめに
私たちは検証環境構築に、サーバー自動構築ツールを導入しています。これにより、一つずつ手動で構築するよりも速く検証環境が構築可能になりました。しかし、サーバー構築後におこなう構成の確認作業 (試験) は自動化できておらず、一つずつ手動で実施する必要があります。構成確認の試験を自動でおこなうツールの導入を検討するために調査をしたところ、オープンソースで利用可能なものがいくつかあることがわかりました。そこで今回は調査したツールについて、どのような特徴があるのかを実際に検証し、比較しました。
検証したツールの紹介
Serverspec
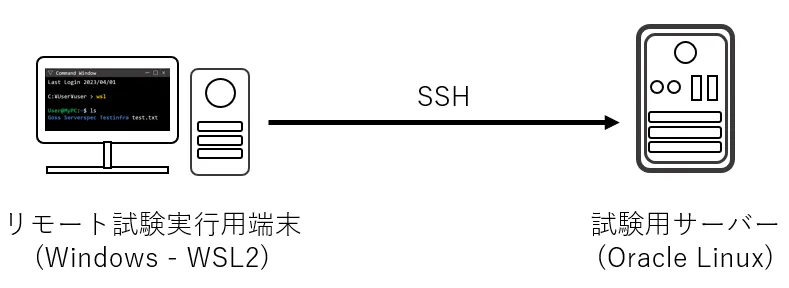
Serverspec ⧉ は Ruby ベースのツールです。Serverspec - Tutorial - Multi OS support ⧉ に記載されているように、Linux をはじめとして多くの OS をサポートしています。Serverspec はローカル環境に対する構成試験以外にも、SSH 接続を用いることで、試験対象のサーバーにリモートで試験を実施することができます。そのためサーバー側にツールをインストールする必要がなく、試験自動化のための不要な構成追加をしなくてもよい、というメリットがあります。試験ファイルは Ruby で作る必要がありますが、試験に必要なファイル (Rakefile 等) を自動で生成できるため、試験ファイルを容易に作成することができます。
Goss
Goss ⧉ は Go ベースのツールです。Goss もマルチ OS に対応していますが、メインは Linux をサポートし、Windows と macOS は限定的なサポートになります。リモートでの試験はできませんが、サーバー側に 10MB 程度の自己完結型バイナリファイルのみを配置するだけで使用できるため、試験後の削除もしやすく、Serverspec と比較して、実行時間も短いです。試験ファイルは YAML で記述します。そのため Go の知識がなくても、公式のドキュメントを参考に試験ファイルを容易に作成することができます。
Testinfra
Testinfra ⧉ は Python 環境で実行可能なツールです。Serverspec と同等なものを目指して、 Pytest (Python 用の試験ツール) のプラグインとして作成されました。Serverspec と同じく試験対象のサーバーに SSH 接続し、リモートで試験を実施することができるため、対象サーバーにツールをインストールする必要がありません。試験ファイルは Python で記述された関数を用いておこないます。
ツール比較のための環境
実行環境
試験をおこなう対象の試験用サーバーと、リモートで試験を実施するリモート試験実行用端末の環境は以下のとおりです。
- 試験用サーバー: Oracle Linux 8.8 (Red Hat OS 系)
- リモート試験実行用端末: Windows10 上の Windows Subsystem for Linux (WSL) 2
- ディストリビューション: Ubuntu 22.04.2 LTS
また、今回利用したツールとプログラミング言語のバージョンは以下のとおりです。
- Serverspec: v2.42.2
- リモート試験実行用端末の Ruby: 3.1.2
- Goss: v0.3.23
- Goss の実行に Go は不要
- Testinfra: v8.1.0
- リモート試験実行用端末の Python: 3.10.12
試験内容
今回はサンプルとして、ファイルとディレクトリーの存在や属性 (権限と所有者と所有グループ) を確認する試験を実施します。
試験対象のファイルとディレクトリー構成
試験用サーバーに、試験対象となる以下のファイルとディレクトリーを作成します。opc は試験用サーバーに登録されているユーザーの名前です。ホームディレクトリーとなる /home/opc/ の下に ServerTestDirectory ディレクトリーを作成します。そのディレクトリーに、権限 644 で所有者と所有グループが opc の servertestfile ファイルと servertestfile2 ファイルを作成します。
## ディレクトリー構成/ home / opc / ServerTestDirectory / servertestfile (権限: 644、所有者: opc、所有グループ: opc) / servertestfile2 (権限: 644、所有者: opc、所有グループ: opc)servertestfile のファイルは、以下の内容を記載します。
server test dataservertestfile2 のファイルは、以下の内容を記載します。
server test data2試験内容
上記の構成について、以下の 4 つの試験を実施しました。試験番号 1 と 2 はすべての結果が OK となる試験です。試験番号 3 と 4 は一部の結果が NG となる試験で、試験ツールの挙動確認のため実施します。
- 試験番号 1:
/home/opcのServerTestDirectoryディレクトリーに対する試験- ファイルパスが存在すること
- 想定する結果: OK
- ディレクトリーであること
- 想定する結果: OK
- ファイルパスが存在すること
- 試験番号 2:
/home/opc/ServerTestDirectoryのservertestfileファイルに対する試験- ファイルパスが存在すること
- 想定する結果: OK
- ファイルの権限が
644であること- 想定する結果: OK
- ファイルの所有者が
opc、所有グループもopcであること- 想定する結果: OK
- ファイル内のテキストに
server testとdataが含まれていること- 想定する結果: OK
- ファイルパスが存在すること
- 試験番号 3:
/home/opc/ServerTestDirectoryのservertestfile2ファイルに対する試験- ファイルパスが存在すること
- 想定する結果: OK
- ファイルの権限が
777であること- 想定する結果: NG (実際の権限は
644であるため誤り)
- 想定する結果: NG (実際の権限は
- ファイルの所有者が
opc、所有グループはrootであること- 想定する結果: NG (実際の所有グループは
opcであるため誤り)
- 想定する結果: NG (実際の所有グループは
- ファイル内のテキストに
not containsとdata2が含まれていること- 想定する結果: 一部 NG (
not contains文字列は含まれないため誤り)
- 想定する結果: 一部 NG (
- ファイルパスが存在すること
- 試験番号 4:
/home/opc/ServerTestDirectoryに所定のno_servertestfileファイル (存在しないファイル) に対する試験- ファイルパスが存在すること
- 想定する結果: NG (ファイル自体が存在しないため誤り)
- ファイルの権限が
777であること- 想定する結果: 試験が行われずにスキップ
- ファイルの所有者が
opc、所有グループもopcであること- 想定する結果: 試験が行われずにスキップ
- ファイルパスが存在すること
各ツールの試用検証
Serverspec と Goss と Testinfra の 3 ツールについて、上記の検証をおこないます。
Serverspec
事前準備
Serverspec - Home - Installation ⧉ の手順でリモート試験実行用端末に Serverspec をインストールします。インストールは Ruby のパッケージ管理ツールの gem を使用します。
## バージョンを指定してインストール$ gem install serverspec -v "2.42.2"インストール後は serverspec-init を実行します。
serverspec-init は試験実施に必要なファイルやディレクトリーを自動で作成します。
$ serverspec-initSelect OS type: # 試験をする OS を選択
1) UN*X 2) Windows
Select number: 1 # 対象が Linux (UNIX 系) のため 1 を選択
Select a backend type: # 試験する端末を選択
1) SSH # リモート 2) Exec (local) # ローカル
Select number: 1 # 今回はリモートから試験を実施するため 1 を選択
Vagrant instance y/n: n # 今回はサーバー構築に Vagrant を利用していないため n を選択Input target host name: [ホスト名] # 接続先のホスト名または IP アドレスを入力 + spec/ # 作業ディレクトリーの下に自動でディレクトリーとファイルが作成される + spec/[ホスト名]/ # 設定した名前のディレクトリーが spec ディレクトリーの下に作成される + spec/[ホスト名]/sample_spec.rb + spec/spec_helper.rb + Rakefile + .rspec今回の試験では試験対象のサーバーに SSH で接続するため、~/.ssh/config に設定を追加します (config ファイルがない場合は新規で作成します)。
Host [ホスト名] HostName [IP アドレス] Port 22 User [ユーザー名] (今回は opc ユーザーを使用) IdentityFile [SSH 接続用の秘密鍵のパス]試験ファイル
試験ファイルは serverspec-init を実行した際に作成された spec/[ホスト名]/ の下に、[任意の名前]_spec.rb という名前で作成します。試験ファイルの作成は、サンプルの試験ファイル (sample_spec.rb) と Serverspec - Resource Types - file ⧉ を参考にしました。
require 'spec_helper'
describe 'file_check_test' do ## 試験番号 1 describe 'Test No.1' do describe file('/home/opc/ServerTestDirectory') do it { should exist } it { should be_directory } end end
## 試験番号 2 describe 'Test No.2' do describe file('/home/opc/ServerTestDirectory/servertestfile') do it { should exist } it { should be_owned_by 'opc' } it { should be_grouped_into 'opc' } it { should be_mode 644 } its(:content) { should match /server test/ } its(:content) { should match /data/ } end end
## 試験番号 3 describe 'Test No.3' do describe file('/home/opc/ServerTestDirectory/servertestfile2') do it { should exist } it { should be_owned_by 'opc' } it { should be_grouped_into 'root' } # 所有グループ情報の誤り it { should be_mode 777 } # 権限情報の誤り its(:content) { should match /not contains/ } # ファイル内の記載に関する誤り its(:content) { should match /data2/ } end end
## 試験番号 4 describe 'Test No.4' do describe file('/home/opc/ServerTestDirectory/no_servertestfile') do # ファイル自体が存在しない it { should exist } it { should be_owned_by 'opc' } it { should be_grouped_into 'opc' } it { should be_mode 777 } end endend試験実施
試験環境と試験ファイルの準備ができたため、試験を実施します。試験の実施には rake spec コマンドを実行します。
$ rake spec実行した結果を確認します。試験ファイルに記載した順番に実行され、失敗した試験には行の後ろに (FAILED - XX) と表示されます。
file_check_test Test No.1 File "/home/opc/ServerTestDirectory" is expected to exist is expected to be directory Test No.2 File "/home/opc/ServerTestDirectory/servertestfile" is expected to exist is expected to be owned by "opc" is expected to be grouped into "opc" is expected to be mode 644 content is expected to match /server test/ content is expected to match /data/ Test No.3 File "/home/opc/ServerTestDirectory/servertestfile2" is expected to exist is expected to be owned by "opc" is expected to be grouped into "root" (FAILED - 1) # servertestfile2 の所有グループが異なる is expected to be mode 777 (FAILED - 2) # servertestfile2 の権限が異なる content is expected to match /not contains/ (FAILED - 3) # servertestfile2 内に "not contains" という文字列が含まれていない content is expected to match /data2/ Test No.4 File "/home/opc/ServerTestDirectory/no_servertestfile" is expected to exist (FAILED - 4) # 該当のファイルがなく失敗 is expected to be owned by "opc" (FAILED - 5) # 直前の試験が失敗していても継続して試験する is expected to be grouped into "opc" (FAILED - 6) is expected to be mode 777 (FAILED - 7)次に、FAILED と判定された試験の名前と試験ファイルの該当箇所が一つずつ表示されます。
Failures:
1) file_check_test Test No.3 File "/home/opc/ServerTestDirectory/servertestfile2" is expected to be grouped into "root" On host `[ホスト名]' Failure/Error: it { should be_grouped_into 'root' } expected `File "/home/opc/ServerTestDirectory/servertestfile2".grouped_into?("root")` to be truthy, got false sudo -p 'Password: ' /bin/sh -c stat\ -c\ \%G\ /home/opc/ServerTestDirectory/servertestfile2\ \|\ grep\ --\ \\\^root\\\$
# ./spec/[ホスト名]/[任意の名前]_spec.rb:34:in `block (4 levels) in <top (required)>'
2) file_check_test Test No.3 File "/home/opc/ServerTestDirectory/servertestfile2" is expected to be mode 777 On host `[ホスト名]' Failure/Error: it { should be_mode 777 } expected `File "/home/opc/ServerTestDirectory/servertestfile2".mode?(777)` to be truthy, got false sudo -p 'Password: ' /bin/sh -c stat\ -c\ \%a\ /home/opc/ServerTestDirectory/servertestfile2\ \|\ grep\ --\ \\\^777\\\$
# ./spec/[ホスト名]/[任意の名前]_spec.rb:35:in `block (4 levels) in <top (required)>'
3) file_check_test Test No.3 File "/home/opc/ServerTestDirectory/servertestfile2" content is expected to match /not contains/ On host `[ホスト名]' Failure/Error: its(:content) { should match /not contains/ } expected "server test data2\n" to match /not contains/ Diff: @@ -1 +1 @@ -/not contains/ +server test data2
sudo -p 'Password: ' /bin/sh -c cat\ /home/opc/ServerTestDirectory/servertestfile2\ 2\>\ /dev/null\ \|\|\ echo\ -n server test data2
# ./spec/[ホスト名]/[任意の名前]_spec.rb:36:in `block (4 levels) in <top (required)>'
4) file_check_test Test No.4 File "/home/opc/ServerTestDirectory/no_servertestfile" is expected to exist On host `[ホスト名]' Failure/Error: it { should exist } expected File "/home/opc/ServerTestDirectory/no_servertestfile" to exist sudo -p 'Password: ' /bin/sh -c test\ -e\ /home/opc/ServerTestDirectory/no_servertestfile
# ./spec/[ホスト名]/[任意の名前]_spec.rb:44:in `block (4 levels) in <top (required)>'
5) file_check_test Test No.4 File "/home/opc/ServerTestDirectory/no_servertestfile" is expected to be owned by "opc" On host `[ホスト名]' Failure/Error: it { should be_owned_by 'opc' } expected `File "/home/opc/ServerTestDirectory/no_servertestfile".owned_by?("opc")` to be truthy, got false sudo -p 'Password: ' /bin/sh -c stat\ -c\ \%U\ /home/opc/ServerTestDirectory/no_servertestfile\ \|\ grep\ --\ \\\^opc\\\$
# ./spec/[ホスト名]/[任意の名前]_spec.rb:45:in `block (4 levels) in <top (required)>'
6) file_check_test Test No.4 File "/home/opc/ServerTestDirectory/no_servertestfile" is expected to be grouped into "opc" On host `[ホスト名]' Failure/Error: it { should be_grouped_into 'opc' } expected `File "/home/opc/ServerTestDirectory/no_servertestfile".grouped_into?("opc")` to be truthy, got false sudo -p 'Password: ' /bin/sh -c stat\ -c\ \%G\ /home/opc/ServerTestDirectory/no_servertestfile\ \|\ grep\ --\ \\\^opc\\\$
# ./spec/[ホスト名]/[任意の名前]_spec.rb:46:in `block (4 levels) in <top (required)>'
7) file_check_test Test No.4 File "/home/opc/ServerTestDirectory/no_servertestfile" is expected to be mode 777 On host `[ホスト名]' Failure/Error: it { should be_mode 777 } expected `File "/home/opc/ServerTestDirectory/no_servertestfile".mode?(777)` to be truthy, got false sudo -p 'Password: ' /bin/sh -c stat\ -c\ \%a\ /home/opc/ServerTestDirectory/no_servertestfile\ \|\ grep\ --\ \\\^777\\\$
# ./spec/[ホスト名]/[任意の名前]_spec.rb:47:in `block (4 levels) in <top (required)>'最後に、試験全体の実行時間と結果が表示されます。ここで、18 の試験のうち、7 つが失敗していることがわかります。また失敗した試験に関して簡単に説明が出力されます。
Finished in 3.22 seconds (files took 0.21034 seconds to load)18 examples, 7 failures
Failed examples:
rspec ./spec/[ホスト名]/[任意の名前]_spec.rb:34 # file_check_test Test No.3 File # "/home/opc/ServerTestDirectory/servertestfile2" is expected to be grouped into "root"rspec ./spec/[ホスト名]/[任意の名前]_spec.rb:35 # file_check_test Test No.3 File # "/home/opc/ServerTestDirectory/servertestfile2" is expected to be mode 777rspec ./spec/[ホスト名]/[任意の名前]_spec.rb:36 # file_check_test Test No.3 File # "/home/opc/ServerTestDirectory/servertestfile2" content is expected to match /not contains/rspec ./spec/[ホスト名]/[任意の名前]_spec.rb:44 # file_check_test Test No.4 File # "/home/opc/ServerTestDirectory/no_servertestfile" is expected to existrspec ./spec/[ホスト名]/[任意の名前]_spec.rb:45 # file_check_test Test No.4 File # "/home/opc/ServerTestDirectory/no_servertestfile" is expected to be owned by "opc"rspec ./spec/[ホスト名]/[任意の名前]_spec.rb:46 # file_check_test Test No.4 File # "/home/opc/ServerTestDirectory/no_servertestfile" is expected to be grouped into "opc"rspec ./spec/[ホスト名]/[任意の名前]_spec.rb:47 # file_check_test Test No.4 File # "/home/opc/ServerTestDirectory/no_servertestfile" is expected to be mode 777Goss
事前準備
Goss はリモートから実行ができないため、Goss 公式の手動インストール手順 ⧉ を参照して試験対象のサーバーに配置します。
## バージョンを指定$ VERSION="v0.3.23"
## パスがとおっているディレクトリー (/usr/local/bin) に配置する$ curl -L https://github.com/goss-org/goss/releases/download/${VERSION}/goss-linux-amd64 -o /usr/local/bin/goss
## 実行ファイルの権限を変更$ chmod +rx /usr/local/bin/goss試験ファイル
試験実行には goss.yaml という名前の試験ファイルが必要になります。試験の作成は、Goss 公式のマニュアル - file ⧉ を参考にしました。
file: ## 試験番号 1 /home/opc/ServerTestDirectory: ## exists は必須パラメーター exists: true filetype: directory
## 試験番号 2 /home/opc/ServerTestDirectory/servertestfile: exists: true owner: opc group: opc mode: "0644" contains: - "server test" - "data"
## 試験番号 3 /home/opc/ServerTestDirectory/servertestfile2: exists: true owner: opc group: root # 所有グループ情報の誤り mode: "0777" # 権限情報の誤り contains: - "not contains" # ファイル内の記載に関する誤り - "data2"
## 試験番号 4 /home/opc/ServerTestDirectory/no_servertestfile: # ファイル自体が存在しない exists: true owner: opc group: opc mode: "0777"試験実施
試験環境と試験ファイルの準備ができたため、試験を実施します。試験は、作成した goss.yaml があるディレクトリーで goss validate コマンドを実行します。goss validate コマンドには出力形式を変更できる -f オプションがあります。今回は見やすいように -f documentation オプションを使用しました。
$ goss validate -f documentation実行した結果を確認します。試験ファイルに記載した試験の順番と実行される試験の順番は異なります。失敗した試験は実際の返却値とその試験の返却値に期待する値が表示されます。また試験対象のファイルやディレクトリーがない試験については、失敗ではなく skipped と表示されます。
## 試験番号 4File: /home/opc/ServerTestDirectory/no_servertestfile: exists: # 該当のファイルがないExpected <bool>: false # 返却値to equal <bool>: true # 試験の返却値に期待する値File: /home/opc/ServerTestDirectory/no_servertestfile: mode: skipped # 該当のファイルがないため、試験番号 4 の試験のうち、3 つの試験がスキップFile: /home/opc/ServerTestDirectory/no_servertestfile: owner: skippedFile: /home/opc/ServerTestDirectory/no_servertestfile: group: skipped## 試験番号 2File: /home/opc/ServerTestDirectory/servertestfile: exists: matches expectation: [true] # 試験を通過File: /home/opc/ServerTestDirectory/servertestfile: mode: matches expectation: ["0644"]File: /home/opc/ServerTestDirectory/servertestfile: owner: matches expectation: ["opc"]File: /home/opc/ServerTestDirectory/servertestfile: group: matches expectation: ["opc"]File: /home/opc/ServerTestDirectory/servertestfile: contains: matches expectation: [server test data]## 試験番号 1File: /home/opc/ServerTestDirectory: exists: matches expectation: [true]File: /home/opc/ServerTestDirectory: filetype: matches expectation: ["directory"]## 試験番号 3File: /home/opc/ServerTestDirectory/servertestfile2: exists: matches expectation: [true]File: /home/opc/ServerTestDirectory/servertestfile2: mode: # servertestfile2 の権限が異なるExpected <string>: 0644to equal <string>: 0777File: /home/opc/ServerTestDirectory/servertestfile2: owner: matches expectation: ["opc"]File: /home/opc/ServerTestDirectory/servertestfile2: group: # servertestfile2 の所有グループが異なるExpected <string>: opcto equal <string>: rootFile: /home/opc/ServerTestDirectory/servertestfile2: contains: patterns not found: [not contains] # servertestfile2 内に "not contains" という文字列が含まれていない次に、失敗判定またはスキップされた試験のみが表示されます。ここでは先に出力された判定結果と判定理由が再度表示されます。
Failures/Skipped:
File: /home/opc/ServerTestDirectory/no_servertestfile: exists:Expected <bool>: falseto equal <bool>: trueFile: /home/opc/ServerTestDirectory/no_servertestfile: mode: skippedFile: /home/opc/ServerTestDirectory/no_servertestfile: owner: skippedFile: /home/opc/ServerTestDirectory/no_servertestfile: group: skipped
File: /home/opc/ServerTestDirectory/servertestfile2: mode:Expected <string>: 0644to equal <string>: 0777File: /home/opc/ServerTestDirectory/servertestfile2: group:Expected <string>: opcto equal <string>: rootFile: /home/opc/ServerTestDirectory/servertestfile2: contains: patterns not found: [not contains]最後に、試験全体の実行時間と結果が表示されます。ここで、16 の試験のうち、4 つが失敗で、3 つがスキップされたことがわかります。
Total Duration: 0.001sCount: 16, Failed: 4, Skipped: 3後片付け
Goss は試験対象のサーバーに試験用の実行ファイルや試験ファイルが残るため、それらを削除します。
## Goss の実行ファイルを削除$ sudo rm /usr/local/bin/goss
## 実行ファイルが削除されたことを確認$ which goss## 何も出力されない
## 試験ファイルを削除$ rm ./goss.yamlTestinfra
事前準備
Testinfra - Quick start ⧉ の手順で、リモート試験実行用端末に pytest-testinfra をインストールします。インストールは Python のパッケージ管理ツールの pip を使用します。pip がインストールされていない場合は、先に pip をインストールします。
## pip がインストールされていない場合は、先に pip をインストール$ sudo apt install python3-pip=22.0.2+dfsg-1ubuntu0.3
## pip で pytest-testinfra をインストール$ pip install pytest-testinfra==8.1.0Testinfra も Serverspec と同様に、試験対象のサーバーに SSH 接続をするため ~/.ssh/config の設定が必要になります。今回は Serverspec の事前準備でファイルの設定をしているため省略します。
試験ファイル
試験実行には Python で書かれた [任意の名前].py という名前の試験ファイルが必要になります。ファイル内に test_ から始まる関数を作成することで、その関数が試験されるようになります。試験の作成は、Testinfra - Quick start ⧉ に記載されている test_myinfra.py と Testinfra - Modules - file ⧉ を参考にしました。
## 試験番号 1def test_no1(host): results = host.file('/home/opc/ServerTestDirectory') assert results.exists assert results.is_directory
## 試験番号 2def test_no2(host): results = host.file('/home/opc/ServerTestDirectory/servertestfile') assert results.exists assert results.user == 'opc' assert results.group == 'opc' assert results.mode == 0o644 assert results.contains('server test') assert results.contains('data')
## 試験番号 3def test_no3(host): results = host.file('/home/opc/ServerTestDirectory/servertestfile2') assert results.exists assert results.user == 'opc' assert results.group == 'root' # 所有グループ情報の誤り assert results.mode == 0o777 # 権限情報の誤り assert results.contains('not contains') # ファイル内の記載に関する誤り assert results.contains('data')
## 試験番号 4def test_no4(host): results = host.file('/home/opc/ServerTestDirectory/no_servertestfile') # ファイル自体が存在しない assert results.exists assert results.user == 'opc' assert results.group == 'opc' assert results.mode == 0o777試験実施
試験環境と試験ファイルの準備ができたため、試験を実施します。今回は SSH 接続を利用して試験をおこなうため、Testinfra - backends - SSH ⧉ を参考にして、pytest --hosts='ssh://[ホスト名]' ./[任意の名前].py コマンドを実行します (実行結果を見やすくするために pytest のオプション -v と --capture=no も併せて使用します)。
$ pytest --hosts='ssh://[ホスト名]' ./[任意の名前].py -v --capture=no実行した結果を確認します。まずテストの実行環境が表示されます。続いて試験ファイルに記載した順番で試験が実行され、試験が成功の場合は PASSED、失敗の場合は FAILED と表示されます。結果は assert 別ではなく、関数ごとに表示されます。
=========== test session starts ============platform linux -- Python 3.10.12, pytest-7.4.0, pluggy-1.2.0 -- /usr/bin/python3cachedir: .pytest_cacherootdir: [試験を実行したディレクトリー]plugins: cov-4.1.0, testinfra-8.1.0collected 4 items
[任意の名前].py::test_no1[ssh://[ホスト名]] PASSED[任意の名前].py::test_no2[ssh://[ホスト名]] PASSED[任意の名前].py::test_no3[ssh://[ホスト名]] FAILED[任意の名前].py::test_no4[ssh://[ホスト名]] FAILED次に、FAILED と判定された試験について、失敗した assert とその試験の返却値に期待する値と実際の返却値が表示されます。関数は上から順に実行され、いずれかの assert で False と判定された時点で AssertionError を返します。そのため、試験の途中で失敗すると、その後の試験は実施されません。
================= FAILURES =================________ test_no3[ssh://[ホスト名]] ________
host = <testinfra.host.Host ssh://[ホスト名]>
def test_no3(host): results = host.file('/home/opc/ServerTestDirectory/servertestfile2') assert results.exists assert results.user == 'opc'> assert results.group == 'root'E AssertionError: assert 'opc' == 'root'E - root # 試験の返却値に期待する値E + opc # 返却値
[任意の名前].py:24: AssertionError________ test_no4[ssh://[ホスト名]] ________
host = <testinfra.host.Host ssh://[ホスト名]>
def test_no4(host): results = host.file('/home/opc/ServerTestDirectory/no_servertestfile')> assert results.existsE assert FalseE + where False = <file /home/opc/ServerTestDirectory/no_servertestfile>.exists
[任意の名前].py:32: AssertionError最後に、試験全体の実行時間と結果が表示されます。ここで、2 つが失敗、2 つが成功したことがわかります。また失敗した assert の理由が出力されます。
========== short test summary info ==========FAILED [任意の名前].py::test_no3[ssh://[ホスト名]] - AssertionError: assert 'opc' == 'root'FAILED [任意の名前].py::test_no4[ssh://[ホスト名]] - assert False======== 2 failed, 2 passed in 4.67s ========比較検証から得られた所感
Serverspec
- 一つの試験対象に対して複数の試験をまとめて記述することができる
- 途中で試験が失敗した場合も、最後まで継続して試験が実施される
- 試験失敗時の返却値がわからない
Goss
- Serverspec、Testinfra に比べて実行時間が短い
- 一つの試験対象に対して複数の試験をまとめて記述することができる
- 途中で試験が失敗した場合も、最後まで継続して試験が実施される
- 試験対象がない場合は試験がスキップされる
- 順不同で実行される
- 試験の名前を設定できないため、試験と結果の紐づけが難しい
Testinfra
- 試験が失敗した理由がわかりやすい
- 一つの試験対象に対して複数の試験をまとめて記述できるが、途中で試験が失敗した場合はその後の試験が実施されない
- 試験を分離する必要がある
おわりに
サーバー構築後におこなう構成確認の試験が自動化されていないため、試験自動化ツールを導入したいと考えました。調査をするといくつかの試験自動化ツールがあることがわかり、その比較検討用に検証をおこないました。検証の結果、試験実行では以下の違いが見られました。
| 試験ツール | 試験ファイル | 実行時間 | 試験実行順序 | 試験ファイルの書きやすさ | 試験結果の分類 | 失敗時の返却値の有無 |
|---|---|---|---|---|---|---|
| Serverspec | Ruby | (基準) | 記述順 | 易しい | ・成功 ・失敗 | × |
| Goss | YAML | 短い | 順不同 | 易しい | ・成功 ・失敗 ・省略 | 〇 |
| Testinfra | Python | 同程度 | 記述順 | 難しい | ・成功 ・失敗 | 〇 |
また、ツールの調査や使用感から、以下のようなメリットやデメリットを感じました。
| ツール | メリット | デメリット |
|---|---|---|
| Serverspec | ・対応している OS が多い ・実行結果が見やすい ・資料も多く調べやすい | (とくになし) |
| Goss | ・実行時間が短い ・プログラミング言語の知識がいらない ・試験ファイルが YAML であるため読みやすい ・試験失敗時の理由がわかりやすい | ・試験対象のサーバーにインストールする必要がある |
| Testinfra | ・試験失敗時の理由がわかりやすい | ・同一の試験対象に対して試験をまとめづらい |
その他所感として、Goss は試験対象のサーバーにインストールする必要がありますが、試験対象のサーバーから別サーバーへの疎通確認ができるという、他のツールにはない機能を備えています。また、試験対象のサーバーに追加でツールをインストールできない場合は、リモートから実行できる Serverspec か Testinfra が使用できます。Serverspec と Testinfra は試験ファイルを Ruby や Python で書くため、それらプログラミング言語に慣れている方はより柔軟な試験を作ることができます。基本的な機能はあまり変わらないため、試験自動化ツールを使用する際は、状況や慣れたプログラミング言語で選ぶのがよいと思います。
記事の執筆にあたっては情報の正確性に努めておりますが、掲載されている文章やソースコード、設定ファイル等の内容について、完全な正確性や安全性を保証するものではありません。活用される際は、必ず公式ドキュメント等をご自身で確認のうえご判断ください。